Guest network access is a cost-effective way to provide visitors with wireless internet service. It is also important in maintaining network security.
- An open wifi connection is provided for guests
-The traffic used in this network is completely different from the business network. Therefore, it does not prevent work done for work. - By establishing a separate network for each guest, these guest networks can also be prevented from communicating with each other.
- For security reasons, it may not be correct to give guests your own wifi password. Therefore, establishing a guest network is a logical method.
How to set up Guest Network
First, log into your router’s interface with your default ip address. These threads are usually 192.168.1.1, 192.168.0.1, 192.168.2.1 IP addresses such as 2.1. Then, you can reach the router administrator page through your browser with your default username and password.
You can see your own router brand default login information here.
Go to Advanced > Guest Network. Locate the Wireless section.
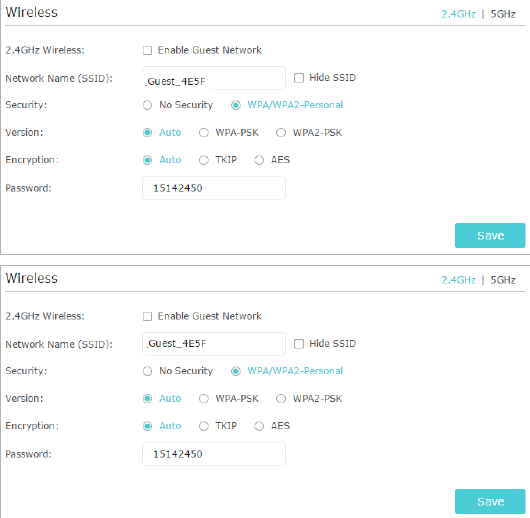
Guest network settings are configured as follows
*First check the “enable guest network” section
*SSID is the username part that the guest will use. You can enter a nickname you want here.
*You should make the WPA / WP2 security part settings. The most important thing here is to enter this section by setting a password that is difficult to guess.
Say “save” all the latest settings.
Note: In some modems, more precisely, there may be configurations such as how many guest networks can be established in the new generation modems and between which hours will there be internet connection in these guest networks. In the settings section that comes up, you can configure them as you wish.
Bhuiya@1210