On this page, we explain how to set up and connect Roku indoor pasture. There are 3 things you need for installation. The first of these is the power adapter, the second is the 2.4 Ghz wifi connection and finally the Roku smart home application. It is important to know what the flashing lights on the camera mean when performing the connection steps. Let’s take a look at them first, then let’s move on to the installation steps.
- Red steady light; Power on means you can setup
- Red flashing light: Ready to connect
- Red and Blue light: Trying to connect to wifi network
- Blue light: Connection established and setup complete.
How to setup your Roku Indoor Camera SE
For installation, you must first connect to the wifi network from your smart device. Please note that the wifi network must be 2.4 ghz.
First, create a Roku account by opening your mobile app. Classically, enter your information and give the necessary permissions requested by the application. Information such as location will make your app work better. Sometimes users do not want to give this information, but this information is necessary if you want to use your camera effectively with the application.
Now all you have to do is add a new device by clicking the + sign in your application.
- Tap + Plus and add device
- Choose Roku indoor camera
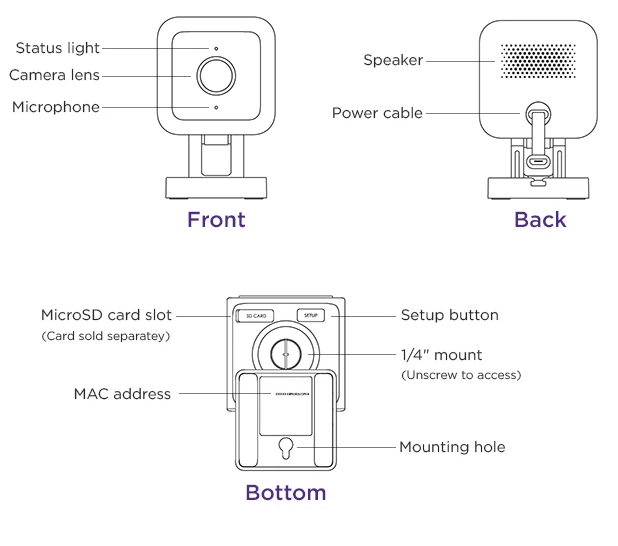
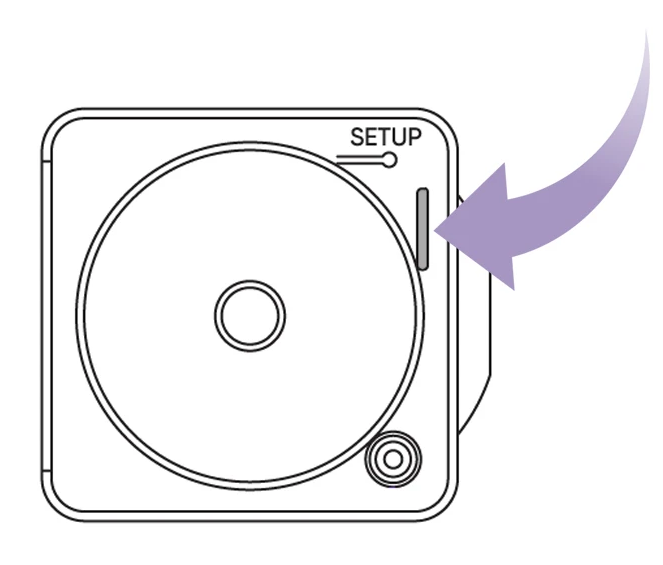
Make sure your camera is plugged in. The camera light turns red when plugged in. Press the Setup button on the bottom of your camera and listen for “Ready to connect”. You can continue the setup process by clicking “next” in the next steps.
After connecting to wifi, hold your camera about 5 inches from the QR code and say “QR code scanned. Please wait.” When you hear the phrase, check the box and tap Next. If you cannot operate the QR code, you will see the serial number on the back of your camera or in the booklet given to you, and by entering it through this application, you will see that it performs the same function as the QR code.
Then tap next again and your camera will turn solid blue when you hear “Setup complete”. The installation process has been completed.
Where should you place your Roku indoor camera in your home?
You can place or mount your camera anywhere in the house depending on your intended use. If you are using your device for security purposes, you can mount it on the wall in the corner of the rooms in your home. You can place it in the corridor to knit the door to control those who come to the house. Thanks to the application, it will send you a notification when motion is detected.
If you want to place a camera to monitor your baby or pets at home, you can place them on a closet or on a flat surface so that you can see or follow them more easily. After placing or mounting your camera, you can adjust the viewing angle up to 180 degrees.
Note: Roku indoor camera sd card supports up to 256GB of memory.
Note: If the roku indoor camera is not connecting to wifi, your wifi network may be 5.0 ghz, not 2.4 ghz. Check this out.
How do I set my Roku indoor camera
We’re can I get my door bell, I want to put it on my TV so I can see who’s at my Apartment door . I have a hard time getting around.there are people coming into the apartments that don’t live here.Cheryl